Most fashion jewelry products on the market are made of brass. Since brass jewelry is usually made of a combination of zinc and copper, it can often tarnish, or oxidize. If you wear brass jewelry, it can often leave a green mark on your skin when you sweat or wash your hands.
Stainless steel jewelry has become popular in recent years as a direct counter to the “green finger” effect. Stainless steel is durable, resistant to rust, corrosion, and tarnishing. However, just like any other material, stainless steel can still become scratched and stained.
Luckily, stainless steel jewelry is very easy to clean compared to brass. Here are some tips that you can follow to take care of stainless steel jewelry:
1. Water and soap
Add some mild dishwashing soap in warm water.
Dip a soft lint-free cloth in the soapy water and then gently wipe the stainless steel jewelry with the damp cloth until it is clean.
Use a moist cloth dipped in clean water to wipe the remaining soap off your jewelry.
Pat dry the jewelry well with a clean towel, and then air dry.
2. Baking soda and water
Mix the baking soda and water until you get a paste.
Use your soft-bristled toothbrush to apply the paste and gently scrub the jewelry.
After you’ve done this for all over the jewelry, rinse the jewelry in warm water until the baking soda comes off.
Wipe off the water with a cloth and then polish the jewelry with a polish cloth (not the one for sterling silver).
3. Toothpaste (use plain and white silica-free toothpaste)
Put a small amount of toothpaste on a damp soft cloth and gently rub the jewelry along the grain. For tough stains, use a soft bristle toothbrush.
After all the stains have been removed, immerse the stainless steel jewelry in clean water and rinse thoroughly.
Dry the jewelry with a soft cloth and polish it with a polish cloth.
How to store stainless steel jewelry?
Last but not least, storing your stainless steel jewelry properly is an important step after the cleaning work is done. Unlike silver and brass, stainless steel jewelry requires much less work to take care of and maintain. However, you can’t just throw your stainless steel jewelry anywhere. It’s very likely it will get scratched if it’s placed with other metals. So the most proper jewelry storage method is to keep your stainless steel jewelry in a clean and safe place, away from other items. Avoid storing your stainless steel jewelry in the same jewelry box as your rose gold rings or sterling silver earrings.
If you want to store all of your jewelry in the same container, you can store your stainless steel jewelry in a fabric-lined case with separate compartments, or wrap pieces individually in soft tissue paper.
We hope you find the above-mentioned tips useful and if you’d like to share your methods taking care of your stainless steel jewelry, leave a comment and let us know!
Do you own a fashion boutique? Perhaps you are in charge of maintaining or decorating a retail space. Even if you sell a small number of handmade items at a local farmers market or flea market, you are leaving money on the table if you are not selling accessories to pair with your clothing! Not only do small accessories delight your customers with additional ways to catch their eye, but they also dramatically increase your revenue per square foot of retail space. Accessories such as rings and necklaces add to your existing product line while taking up minimal display space. These small items also have “impulse purchase” appeal due to their eye-catching nature and often more inexpensive prices. Finally, accessories can help you sell more of your existing clothing by letting you re-frame your existing line in a new perspective.
Do’s and don’ts of displaying accessories
Now it’s easy to talk about adding accessories to your fashion line, but how do you actually do it? Here we will go over some easy do’s and don’ts to maximize your accessories selling potential.
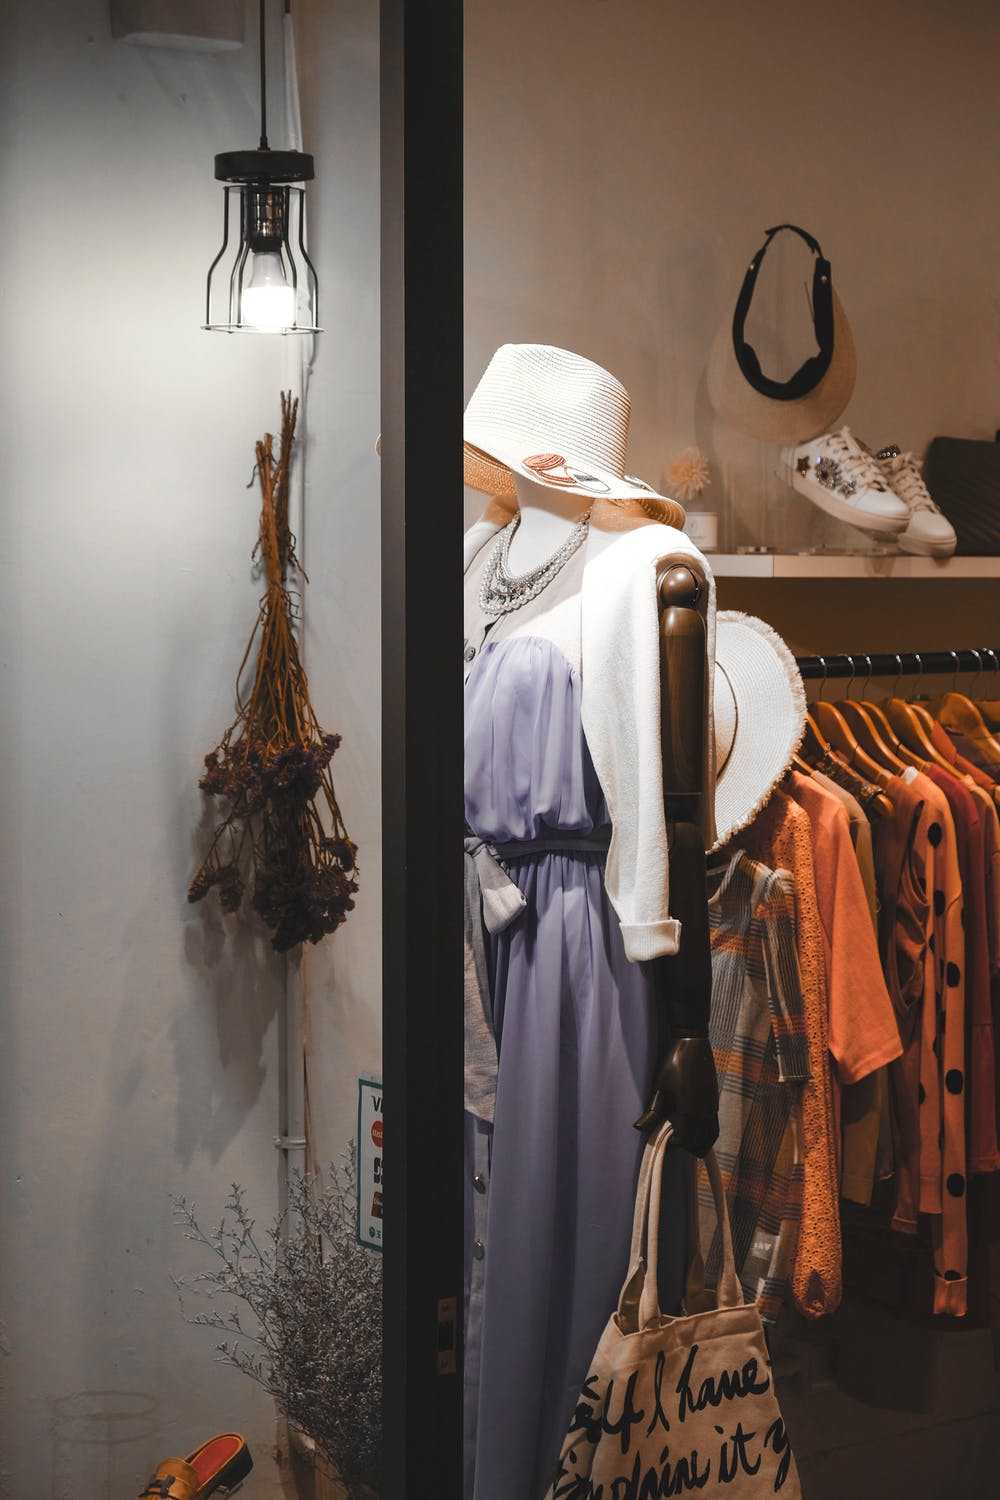
Do: Utilize your existing space
Do you already have display mannequins to display your clothing line? Focus on what you already have and make sure your designs flow naturally. For example, if you already have a hat as an accent piece to your ensemble, add a chunky necklace to focus the eye upwards.
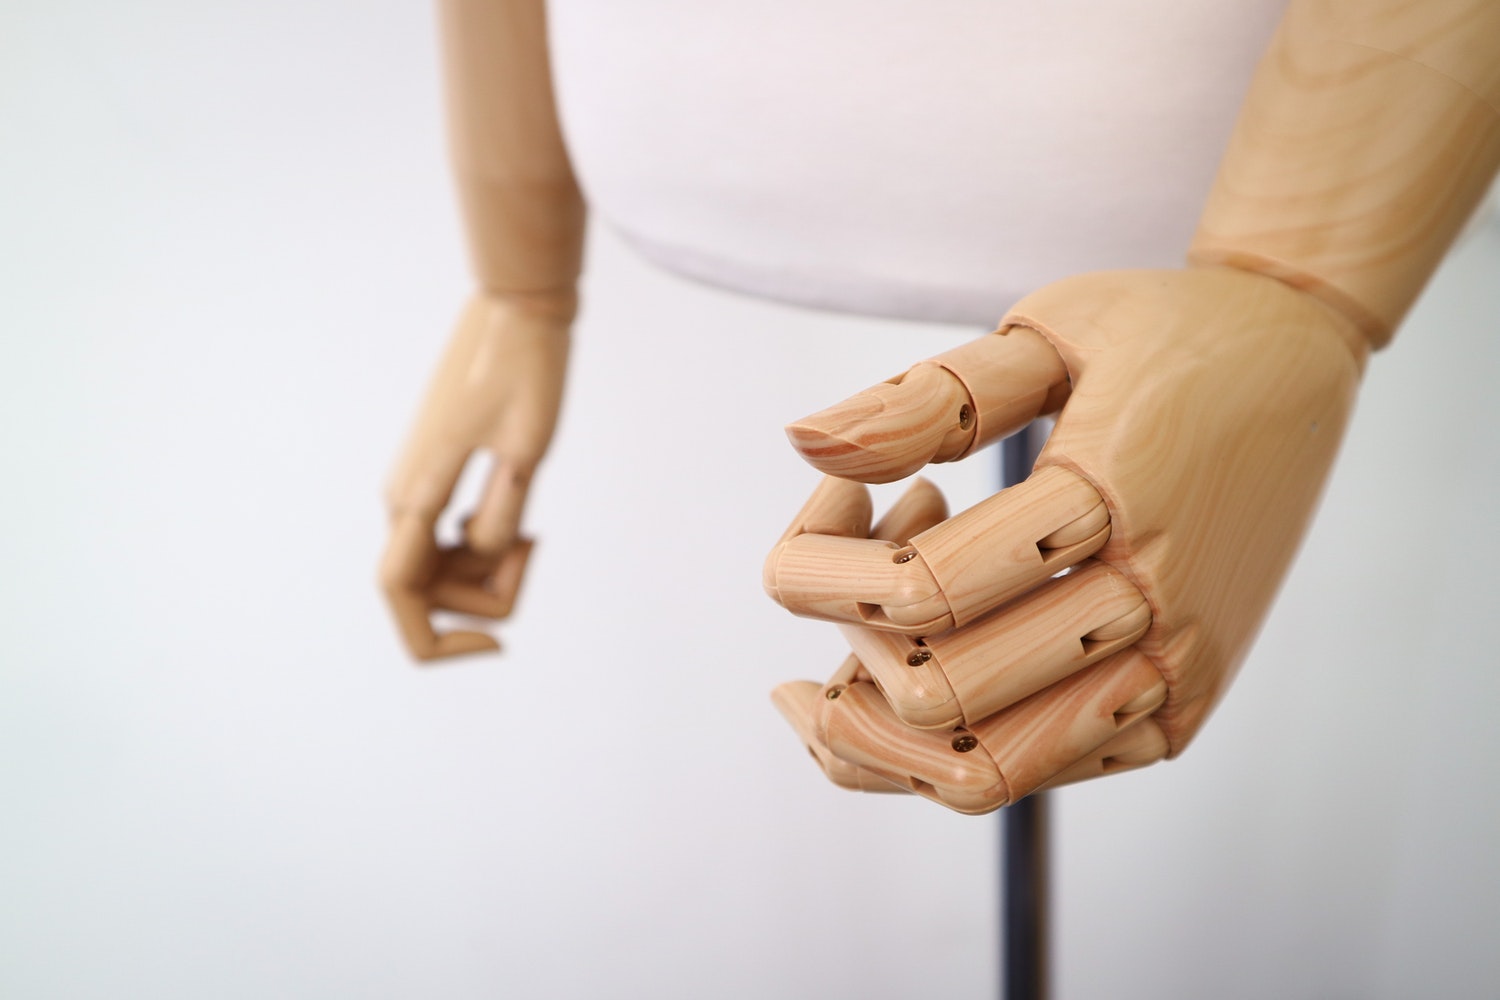
Also, not all displays are equal. If shopping for a new mannequin, consider one with articulated fingers. Not only does this type of display open you up to new display poses, but it also allows you to add rings which can have similar profit margins compared to much larger clothing items while taking up significantly less floor space.
Don’t: Use a flat lay that falls flat
Laying items flat on a table is probably the most basic and common way of displaying small items and accessories. There is not necessarily anything wrong with this method but avoid lining up items in perfect rows and groupings. Packing items together too tightly tends to create a camouflage effect where no individual item stands out.
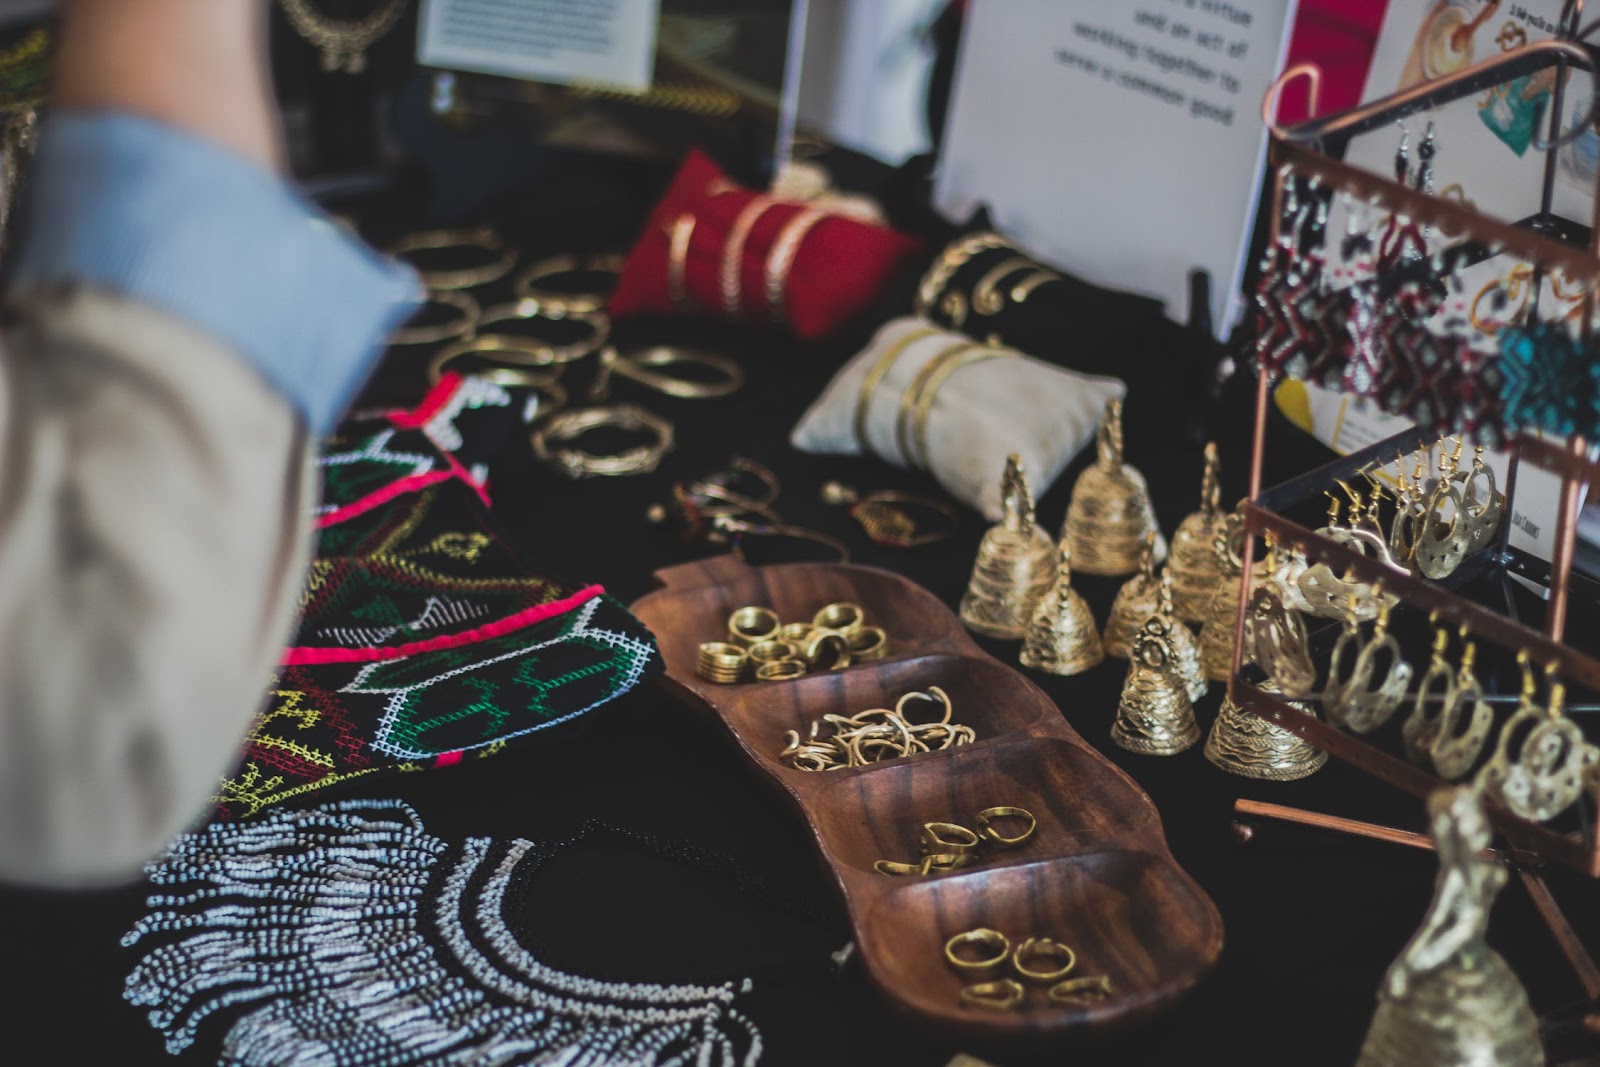
Do: Use a theme and irregular display shapes and patterns
Breaking up regular patterns and shapes will draw attention to details where there was none before. These uneven patterns might make the perfectionist in you go crazy but that’s kind of the point. Regular patterns bore the eye. Try variations on height, color, materials, and shapes. When you do group items together, try to do so in a way that tells a story such as silver items from a particular place or gold items that evoke a certain time period.
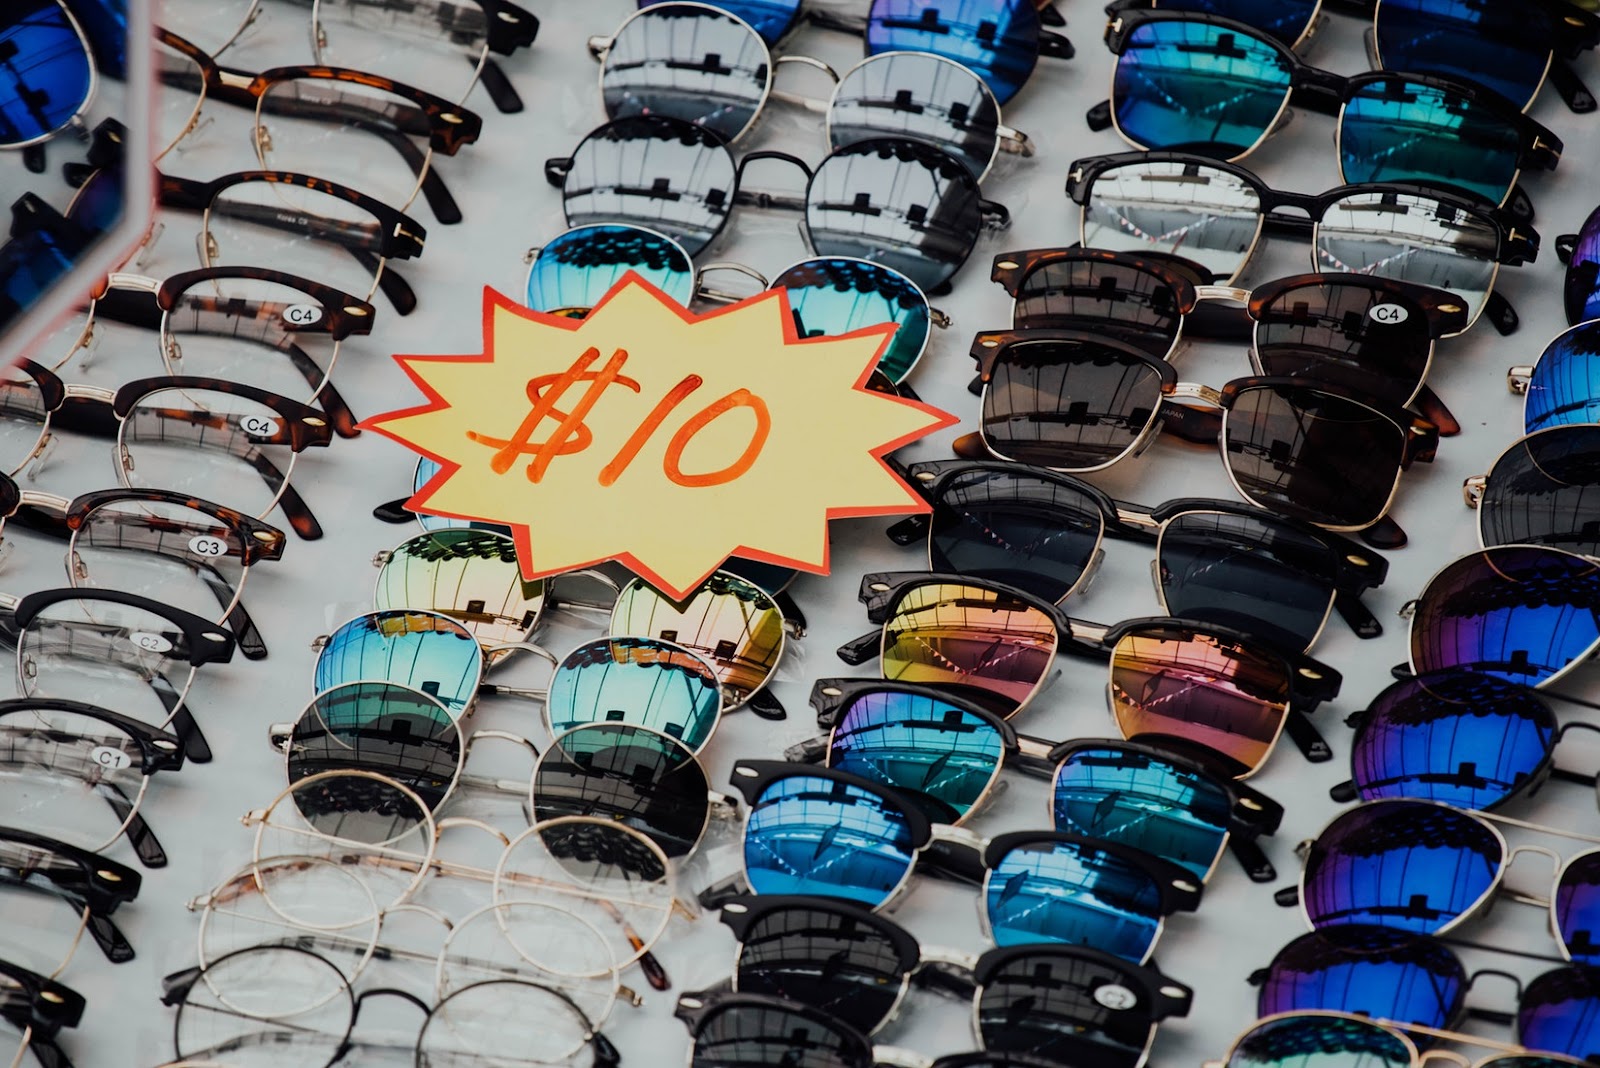
Fashion jewelry can be the perfect “impulse” purchase. Much like a candy bar at the checkout aisle, small and eye-catching items can give customers that extra dopamine hit right when they are already in the mood to buy. The price point is important here. Overly expensive items will not trigger that impulse purchase response. The right price depends on the relative price of other items in your store but under $10 or $20 is a good rule of thumb. Also, remember to utilize space to your advantage such as stand up displays. Veritical displays take up less space at the checkout line and can be placed in the direct eye line of the customer.
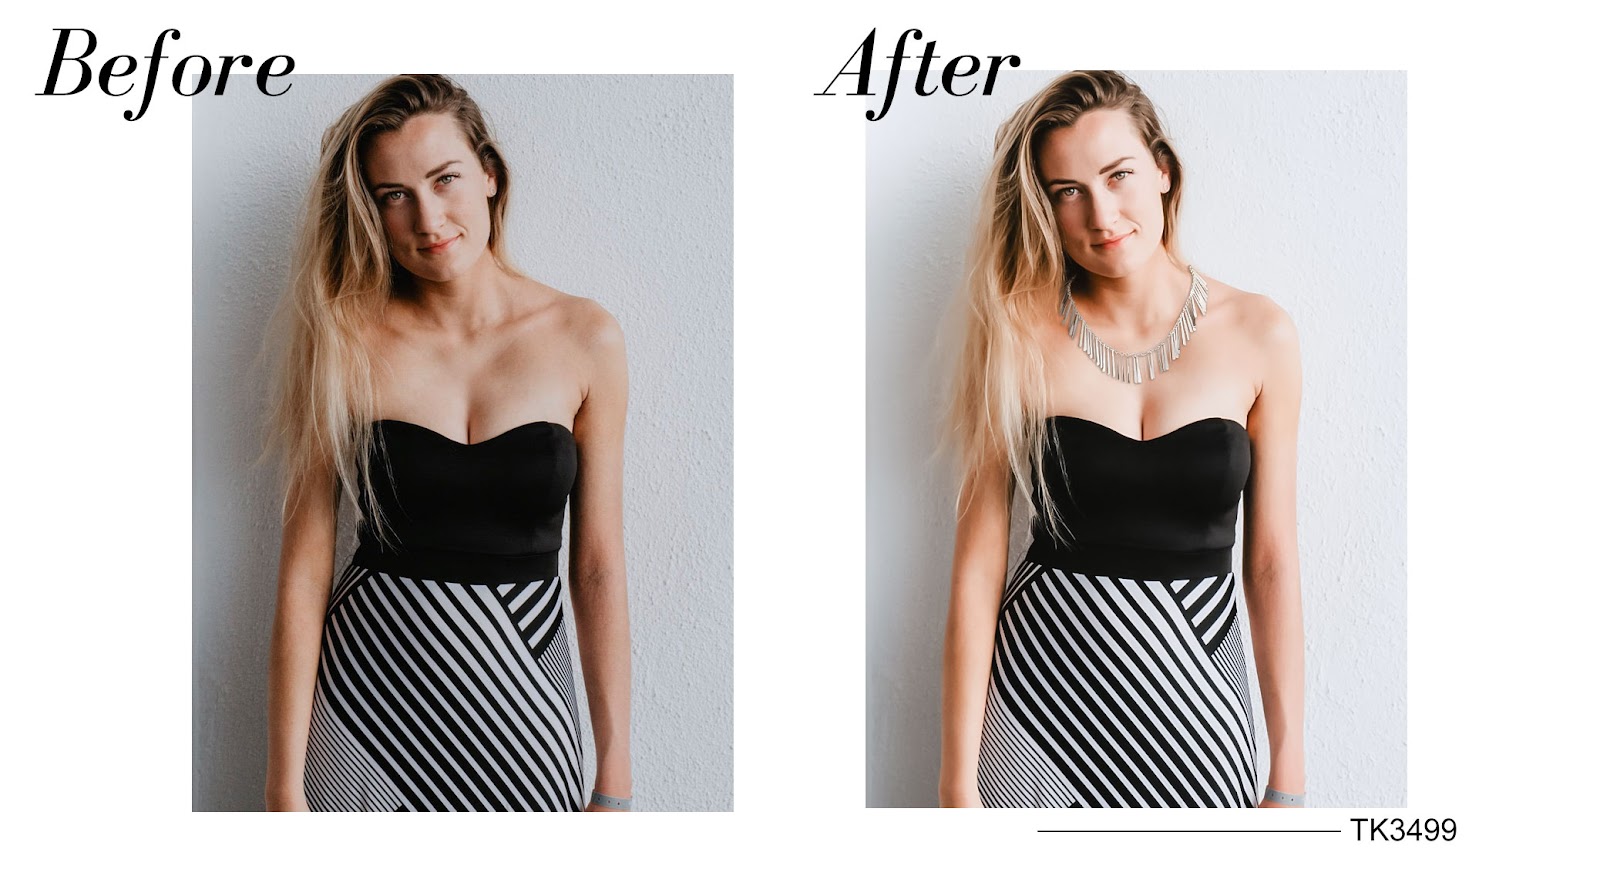
You will often not want to add an accessory for no reason. An accessory should be able to accent a particular item for a particular reason. In this case, the parallel lines created by this long stranded necklace helps complement the geometric design of this strapless dress. This complementary factor can not only help you sell the accessory but helps to accentuate the dress to make a potential buyer see your primary item in a new light.
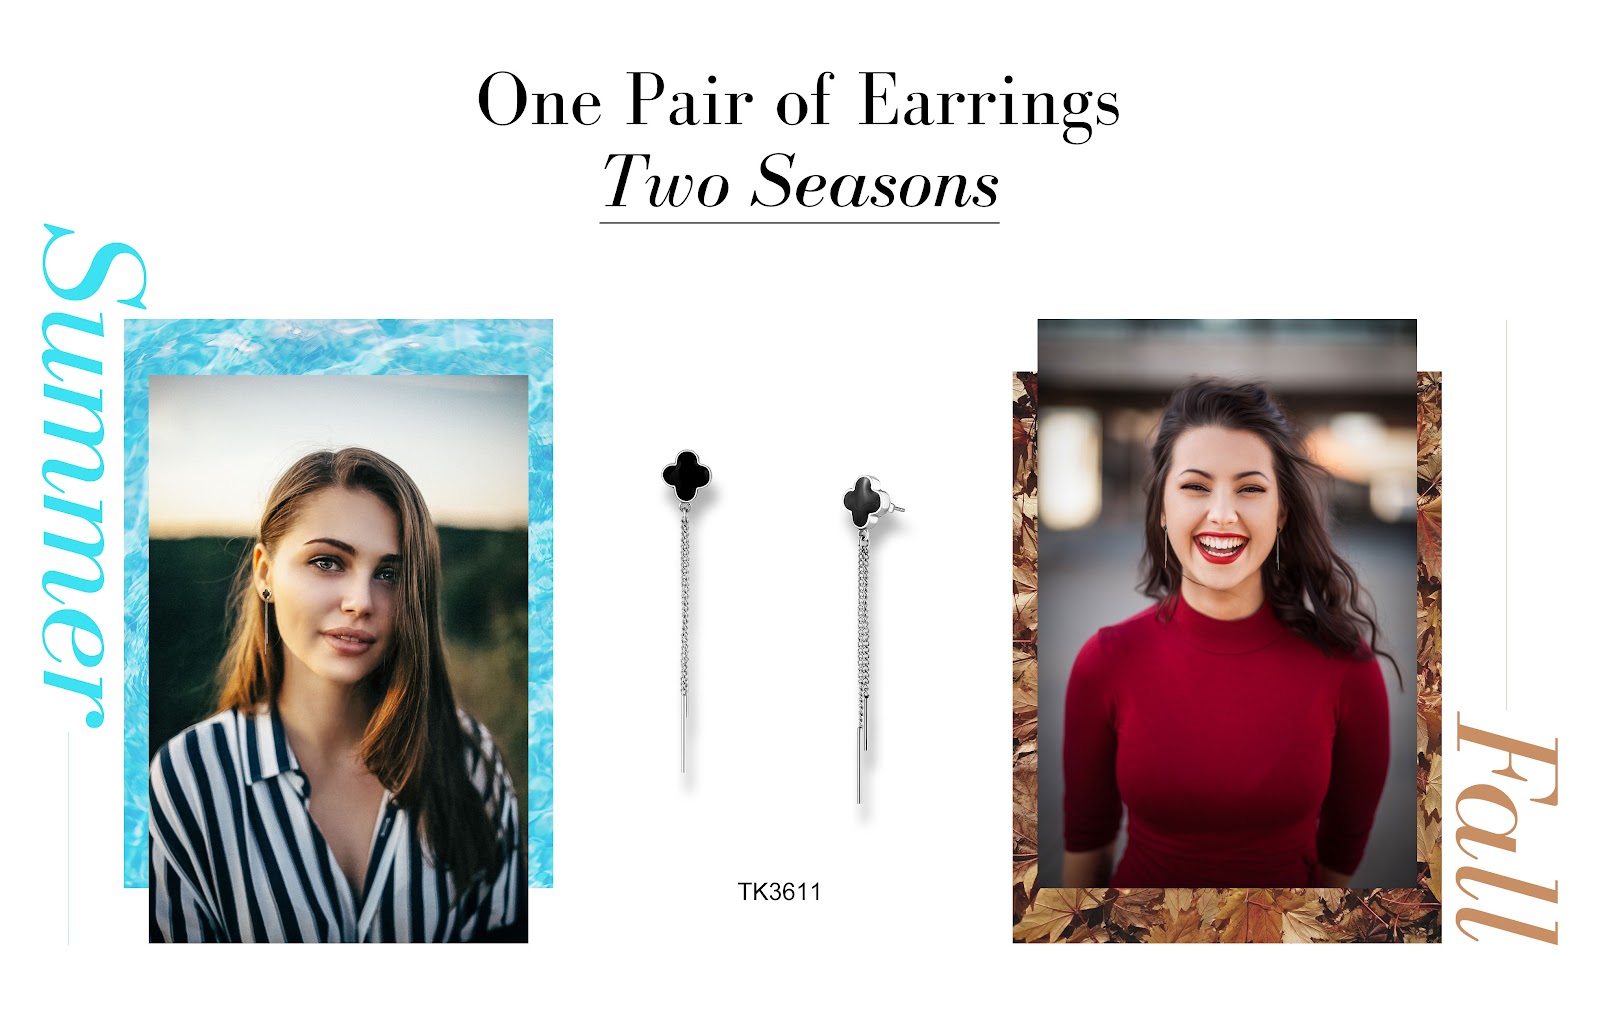
Do: Reuse existing designs for multiple seasons
The beauty of selling accessories as a complementary item is that they are never the star of the show, so you can get away with reusing the same item more than once. This allows you to reduce inventory while still staying stocked for all seasons.
Even if you sell primarily clothing, you should not forget about accessories. Small fashion jewelry such as rings and earrings not only adds another revenue stream with minimal display space, but it can also help you sell your existing products.
Have any questions? Leave us a comment below or email us at service@alamodeonline.com. We would love to hear from you!
Amazon is one of the easiest platforms to use… as a customer. As a seller, the story is quite different. If you have ever listed a product on the Amazon marketplace, you know how frustrating it can be. Waiting 15 minutes for inventory updates to show, pictures not uploading correctly and cryptic error messages. These are problems you will run into constantly if you use Amazon’s selling platform. However, the worst experience is when you are trying to do something that’s non-standard. Today we will do run through one of these activities by creating a new fashion jewelry listing without a UPC.
The problem
Amazon expects you to list an item by looking for an existing universal identifier such as a UPC or their own Amazon identifier ASIN. They do this to provide a better experience to end users since it would reduce the number of repeat listings. This is great for customers but what about new items that do not have a UPC, like jewelry.
Amazon does allow items to be listed without a UPC but often an exemption is required. For some products, like unbranded jewelry, Amazon gives a blanket exception and allows you to list against an ASIN that they generate for you. However, at the time of this writing, the Amazon Seller web interface no longer lets you do that.
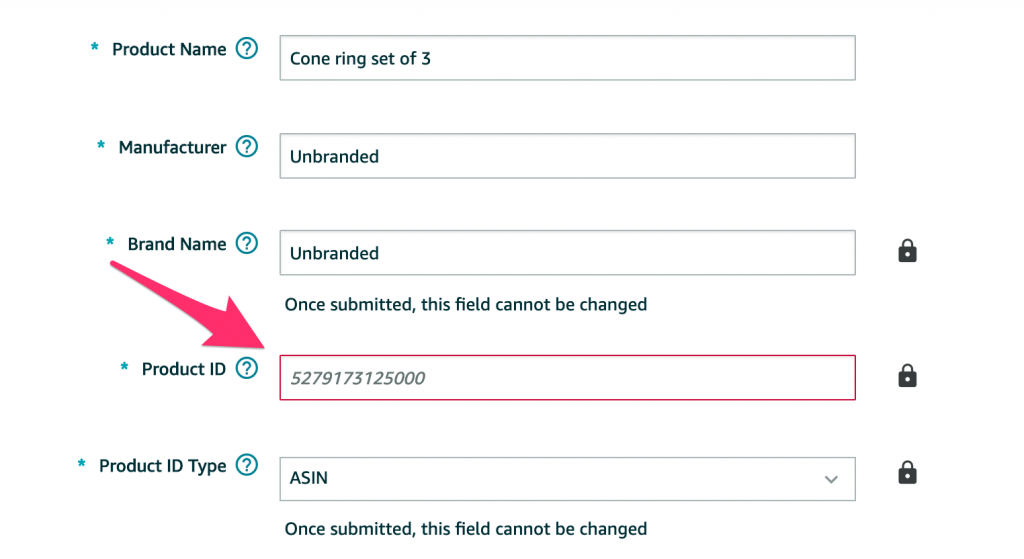
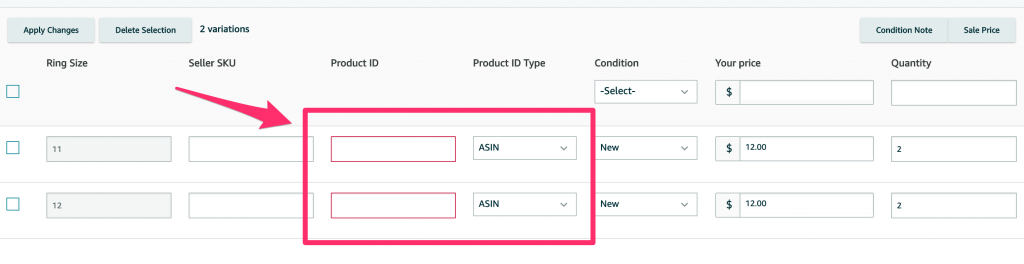
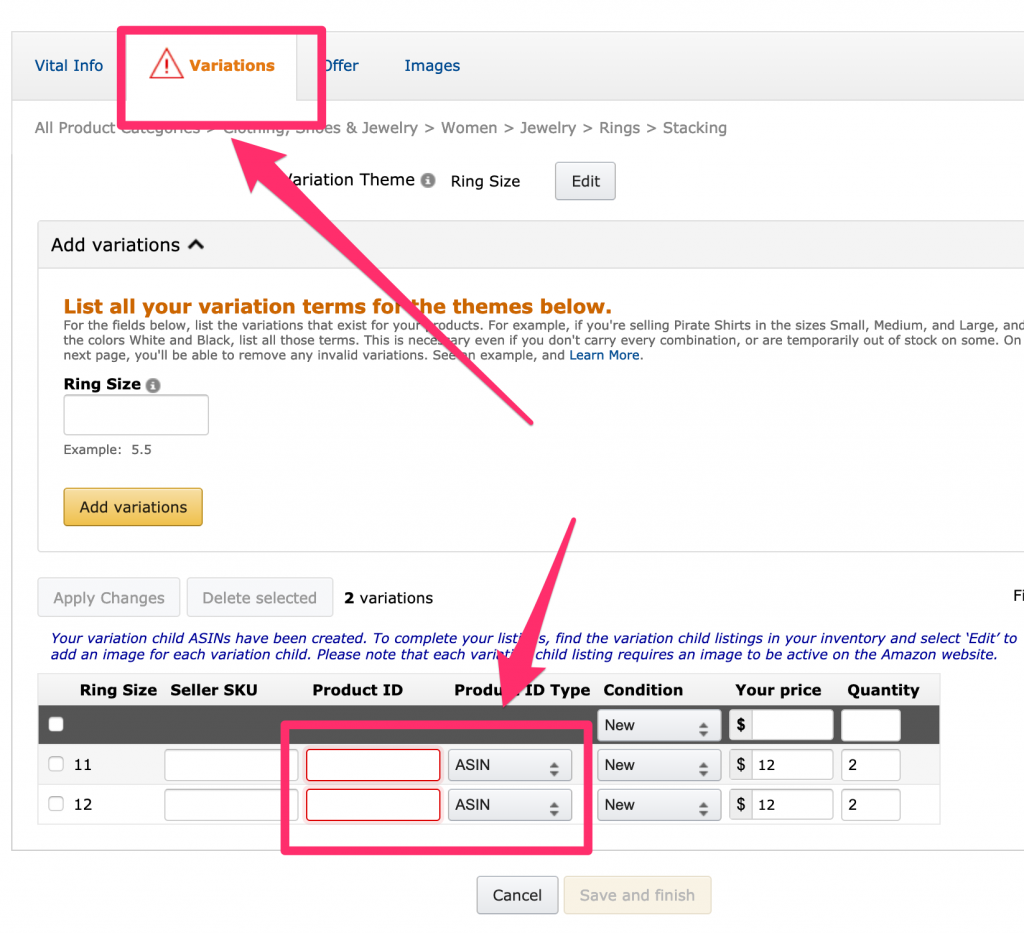
Trying to add an item without an existing ASIN does not allow you to save. The same problem occurs when trying to add a variation, which is all but necessary for items that require sizes such as jewelry.As long as a section up here stays red, you can’t save your new product.
In the past, when you listed an item, like jewelry, without a UPC, you can choose to use an ASIN and the system would generate an ASIN for you. You could then add the product under the newly generated ASIN. As you can see in the screenshot above, this is no longer true.
Even reverting back to the original interface also does not work.
You still have the option to return to the old interface. Still can’t save in the old interface.
So officially, you can still apply for an exemption or you can use a third party ASIN generator to get the ASIN to input into these forms, but that can be very costly and time-consuming.
The Workaround
Fortunately, we still have a workaround. We can still use upload templates to create new listings without having to use UPCs. Today we will walk through how to upload a new fashion ring listing with multiple size variations into the Amazon Marketplace using a template.
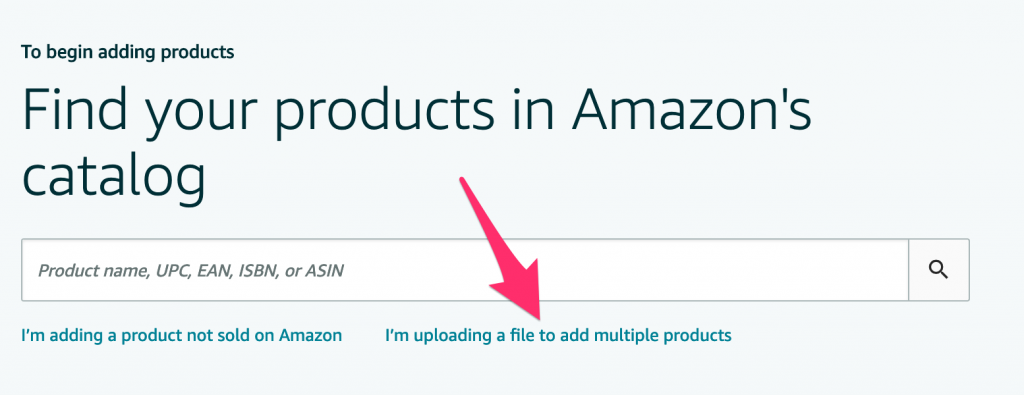
1. Download a template file
First, download the correct template from Seller Central.
Choose the appropriate category.
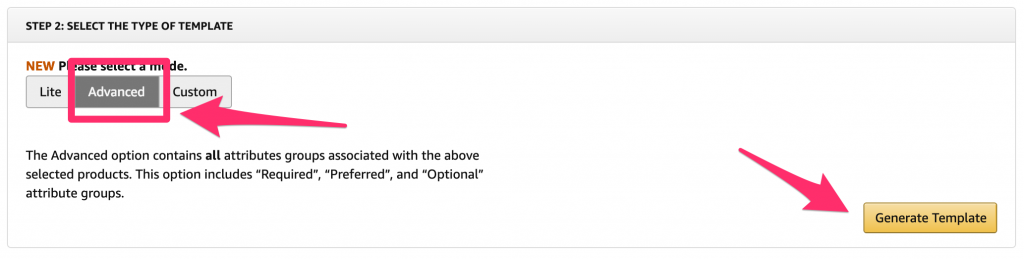
Since we are going to want to create a product with a size variation, make sure to select the “Advanced” template.
Choose the Advanced option if you are uploading a product with variations. If you do not have variations then you can choose the Lite option.
2. Fill in the necessary fields in the template
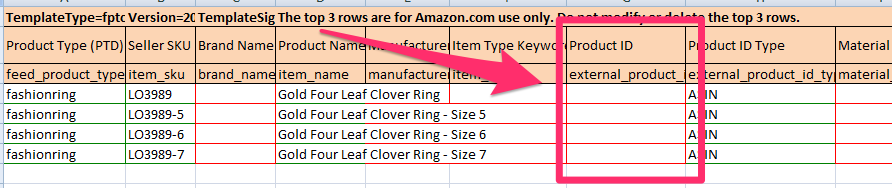
The first row will be the “parent” listing. The parent listing won’t have a price or quantity but the “child” listing underneath it will. In our case each child will be a different size variation.
Each child should have a different seller SKU. These can be anything you want since it will only be visible to you but it would be useful for you to name them so you can easily track your products. In this example, I will make each child SKU the parent SKU with the size appended at the end. You don’t have to have a different Product Name for each item, but it would be a good idea to add the size to each title to make it easier for customers differentiate your listings and for yourself when it is time to fulfill the item. Choose “ASIN” for the Product ID Type and leave the Product ID field blank.
You can leave this field blank. You can leave this field blank.
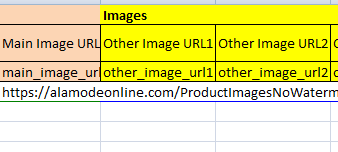
3. Add image links
Be sure to add an image link in the Main Image URL field, even for the Parent listing.
The Main Image URL needs to be set for the Parent listing as well
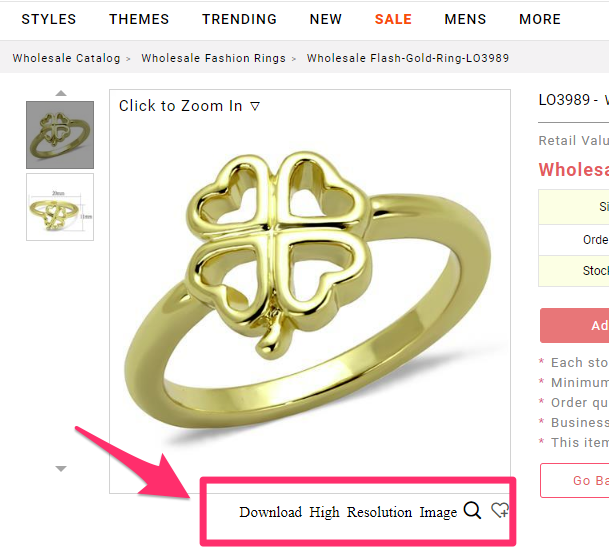
This URL should be a publicly accessible link, so if you are using Google Drive or Dropbox, make sure that the link has the proper permissions set. If you are uploading an Alamode product, you can find our image links on the product page. You can also find all image links in our inventory list.
Our product page links are publicly accessible so they can be used directly on the upload template.
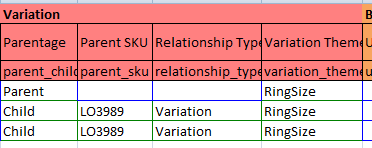
4. Fill in the parent child relationships
Not all fields need to be filled out, but make sure to fill in the “Variation” section and mark the first row as “Parent” and the following rows as “Child”. Each child will need a Parent SKU. In this case, the parent SKU will be the value of the “Seller SKU” field of the first row. Note that the Parent SKU and Relationship Type fields of the parent row should be left blank.
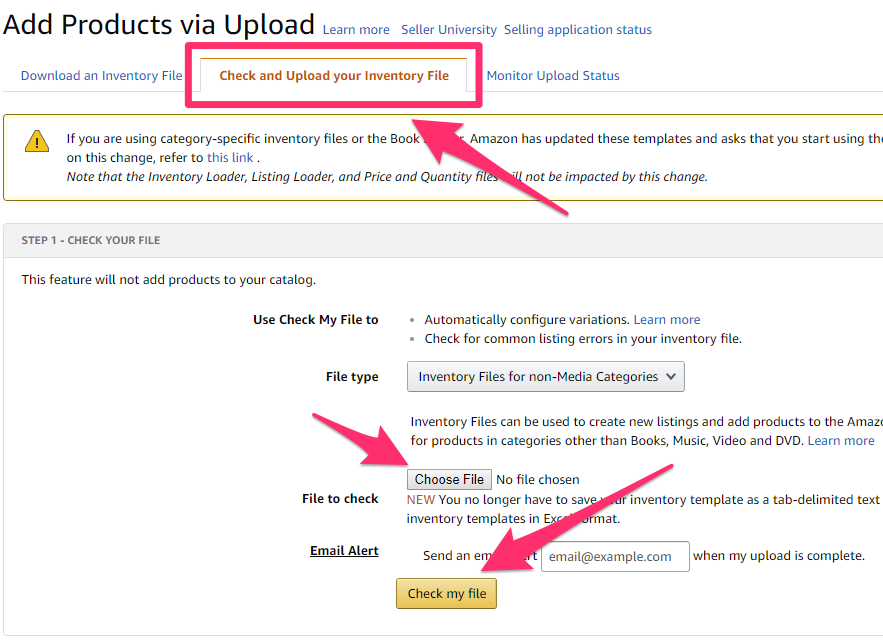
5. Check your file
After filling out any other optional fields, such as the bullet point descriptions, size, and quantity you can check your file. Although optional, it is recommended that you check your file for errors before you formally upload it. While this does add an extra step in your workflow, it is a lot easier to fix errors before your official upload than to try to fix errors after the fact.
It is recommended that you check your file before final submission.
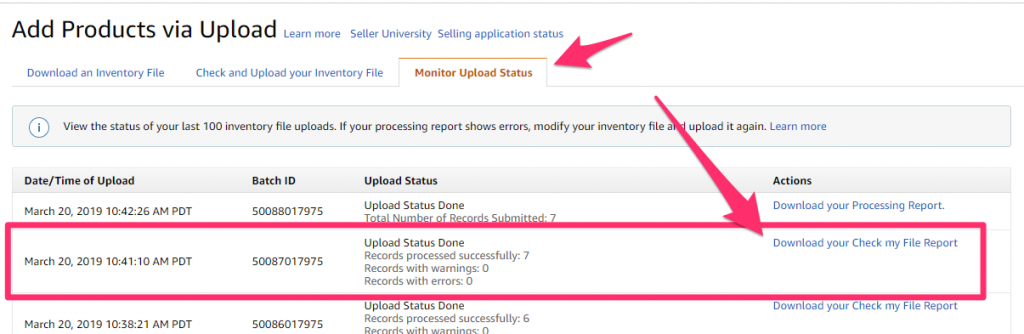
The results of your check will be available on the next tab. It might take a few minutes to generate your results.
If you have a very large file, you might want to use the email alert feature to be monitored when the report is complete.
6. Upload your final file
Once everything looks good, perform your final upload in the section below the file check section on the first tab.
And that’s it! You can monitor the upload on the third tab. If there are no errors, the final tab will show you if your listings have uploaded successfully. Be aware that it can take up to 15 to 30 minutes before your listings show completely. Very often listings will appear without images. Give it a few minutes, if the images do not show up then you can edit the listing manually.
Conclusion
I hope this guide helps you list your products on Amazon more easily. If you have any questions, be sure to leave a comment below or send an email to service@alamodeonline.com and we will try to get back to you as soon as possible!
There are many kinds of earrings on the market: long drop earrings, dangle earrings, chandelier earrings and etc. But do you know what kind of earrings is best matched to your face shape? Today we are going to teach you how to choose the earrings that best suits you!
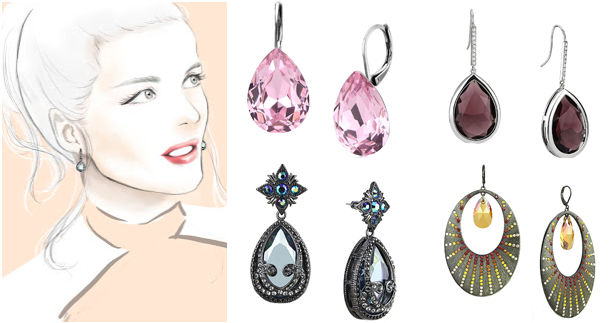
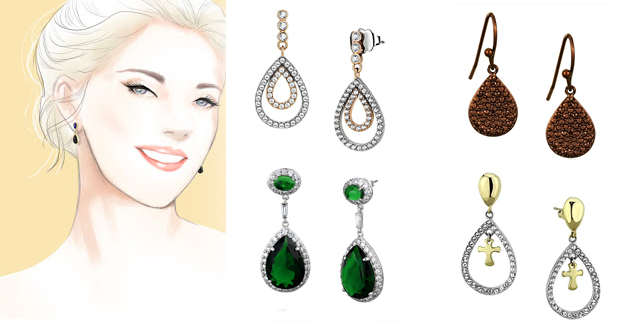
1. Diamond-shaped face: Delicate drops
Your forehead and chin are narrower than the cheekbones. To balance a diamond-shaped face, choose earrings with more width than length, such as delicate drops, to bring out your natural beauty.
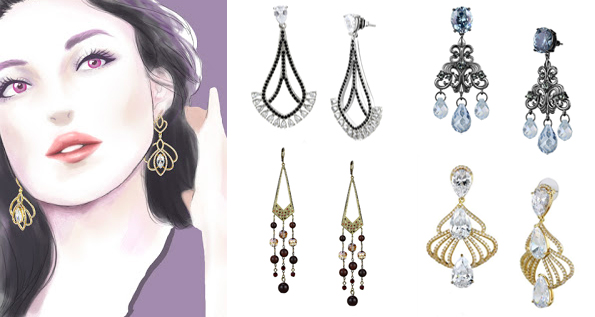
2. Round-shaped face: Long drop and dangle earrings
If the width of your forehead, cheekbones, and jaw are about equal, wearing long drop and dangle earrings are a great way to elongate the face.
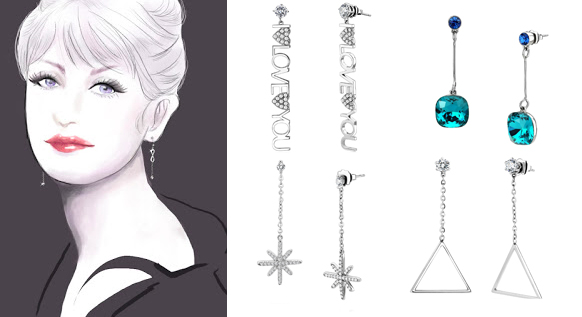
3. Heart-shaped face: Teardrops
Try teardrop styles or designs that are wider at the bottom to balance a triangular face shape.
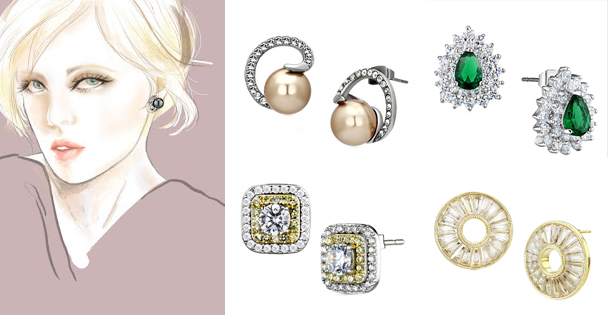
4. Long face: Short dangles, pearl earrings
Earrings like short dangles and pearls help to visually complement a longer face by shortening your overall look.
5. Square-shaped face: Chandelier earrings
Chandelier earrings are the perfect choice for you. They can soften the natural angles of the face and accentuate the cheek-bones.
6. Oval-shaped face: Any style of earrings!
Lucky you! You can basically wear any style of earrings. Pearls, teardrops, ovals, all give a soft compliment your face’s natural contours.